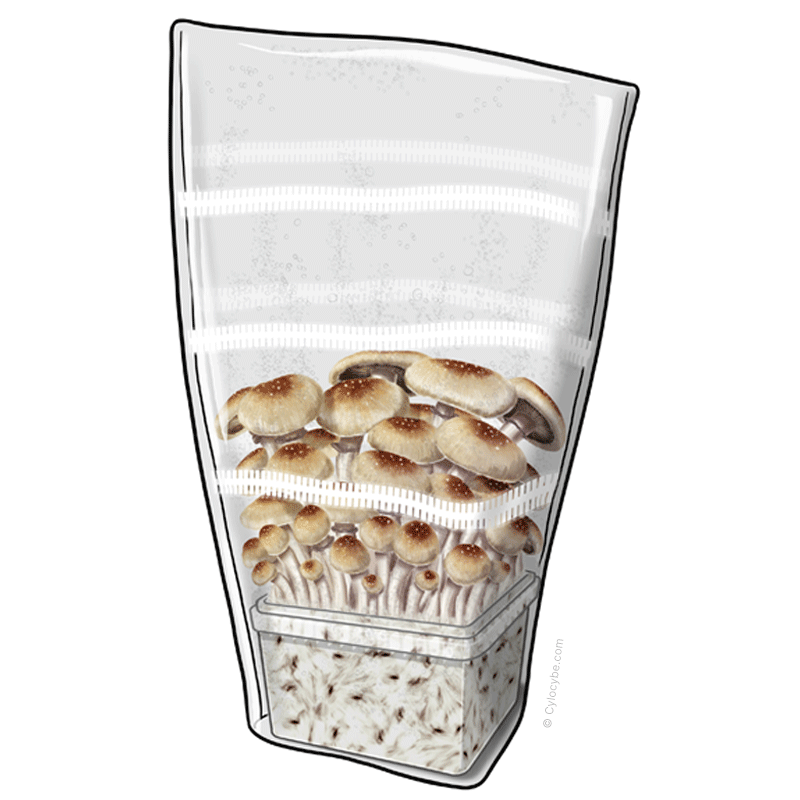


MonoBox™ Grow Kit
As of Saturday 29th November, we have run out of stock of all grow kits (it’s been super busy).
BUT, we have the brand new Letterbox Monster Grow Kit available now!
Whether you are brand new to mushroom growing or you’re well versed and starting from agar wedge, our MonoBox Grow Kit has your back.
Our online guide assumes a complete beginner but it’s flexible enough for any experience level.
Important / 6th November: We are out of stock of the 1.6L MonoBox container, so we will instead provide 2x 1L rounded tubs. As this adds up to 2L (25% bigger) – we will also provide more coir to bulk it out. All instructions on the guide are the same, except you’ll need to add 25% more water and split the substrate over two tubs instead of one. For fruiting, you will of course put both ‘cakes’ into the same tent – as the combined surface area of the two cakes is greater, this option can provide excellent fruiting potential!
Based on the popular “monotub tek” from late 2000’s
Unlike traditional kits that skip some of the most fun parts, MonoBox™ has you first producing mushroom spawn by injecting sterile grain, then after mycelium covers the grain you will be mixing it with a substrate by hand before fruiting your mushrooms. This is real mushroom growing 101.
History with this grow kit
We can’t wait for you to experience mushroom cultivation with a kit we’d have killed for when we first began our mushroom journey!
Inoculation options
- Spore or Liquid Culture Syringes (The simplest method for beginners!)
- Spore Swabs (Experienced)
- Agar Transfers (Experienced)
- Grain to Grain Transfers (Experienced)
Important
The specialised filters on the Grow Box and Tent allow for clean air exchange – Don’t ever try to remove these.
NEVER open the SpawnTubs™ before full colonisation of mycelium or the kit will be ruined with contamination.
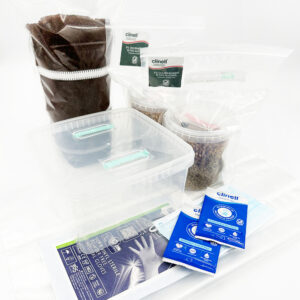
What’s included (XL MonoBox™ Kit)
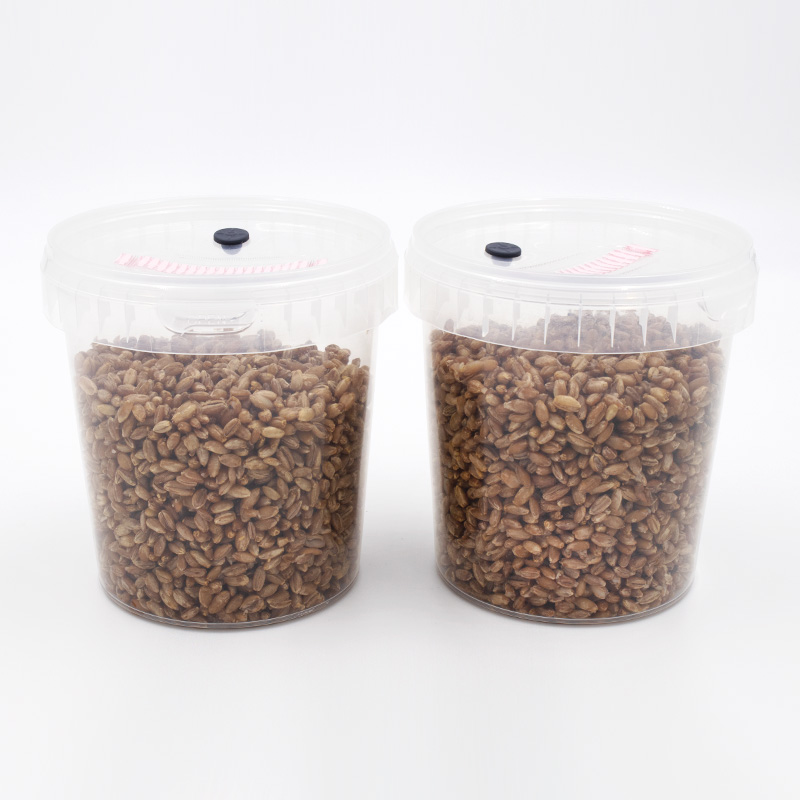
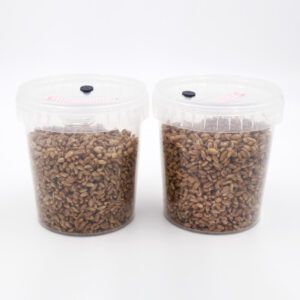
- 1x 650ml SpawnTub™ of Sterile Rye Grain.
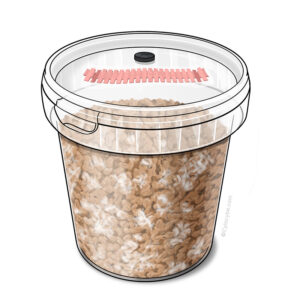
1.6L HEPA-Filtered Grow Box.2x 1L HEPA-Filtered Grow Tubs- 1L Expandable Mushroom MycoWave™ Substrate (Coir-based).
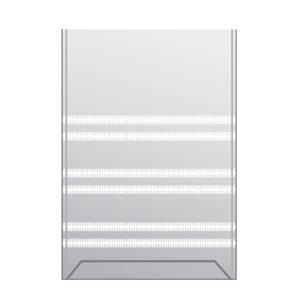
- XL Grow Tent with specialised filters for clean air exchange.
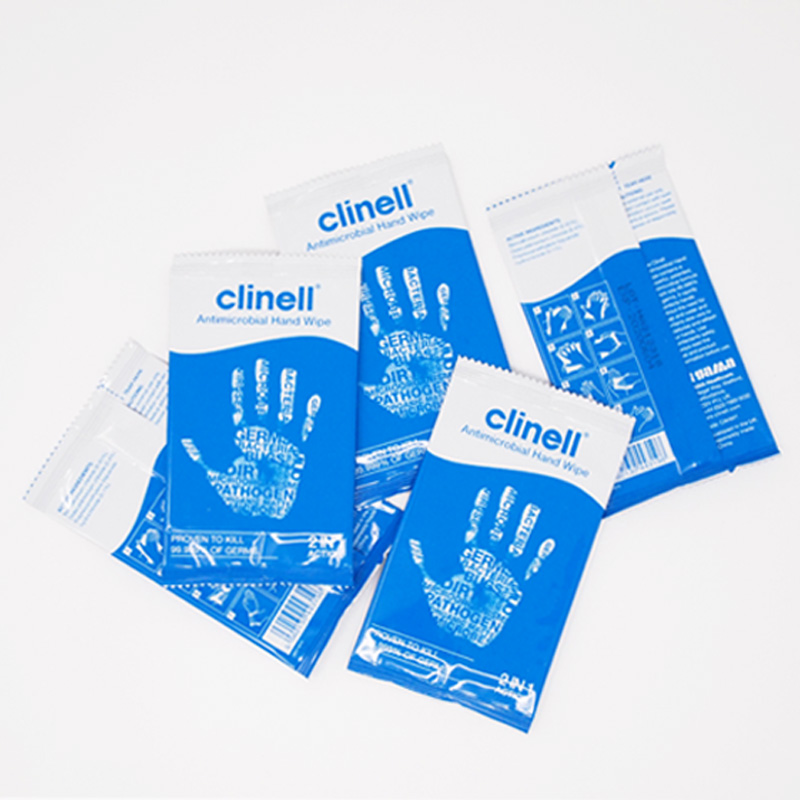
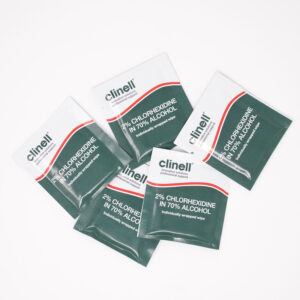
- Hygiene Kit with 2x chlorhexidine wipes, 2x hand wipes and 2x sterile needles.
- Online Instructions.
What’s included (XXL MonoBox™ Kit)
- 2x 650ml SpawnTubs™ of Sterile Rye Grain.
- 3.1L HEPA-Filtered Grow Box.
- 2L Expandable MycoWave™ Mushroom Substrate (Coir-based).
- XXL Grow Tent with specialised filters for clean air exchange.
- Hygiene Kit with 2x chlorhexidine wipes, 2x hand wipes and 2x sterile needles.
- Online Instructions.
Not included
- Gourmet Spore or Culture Syringe – You will need 1.5-2ml for the XL kit and 3-4ml for the XXL kit.
Storage
We advise inoculating SpawnTubs™ within 4 weeks, but they’ll generally be fine for many months!
Advice
- This kit also supports other inoculation techniques than just syringe, as the lid is removable.
- We now tape around the rim of every SpawnTub lid (post-sterilisation, under laminar flow) for greater contamination resistance.
- First big harvests can appear in as little as 4 weeks, with multiple flushes possible until the substrate is spent.
- Min/Max incubation temperature for gourmet spores is between 18-24°C. Though, 24°C will provide much faster colonisation times than 18°C.
- Harvests of 500g – 1000g+ of fresh mushrooms are achievable.
Important
We ship from the UK to almost anywhere in the world. Each kit is made fresh to order and typically dispatched within 3 working days (please see our Shipping and Dispatch page in the footer for more info).
Only use this product for cultivating legal gourmet mushroom species
Grow Guide for MonoBox™ Mushroom Grow Kit
For both XL and XXL versions
Follow this comprehensive guide to achieve the best results with your MonoBox™ Grow Kit. We also recommend reading our troubleshooting guide for more detailed information which will help you solve and avoid problems.
Kit Contents
XL MonoBox Grow Kit Includes:
- 1.6L HEPA-Filtered Grow Box
- 100g of 1000ml Expandable MycoWave™ Mushroom Substrate
- XL Grow Tent
- 1 Sterile Grain SpawnTub™ (approx. 650mL of grain)
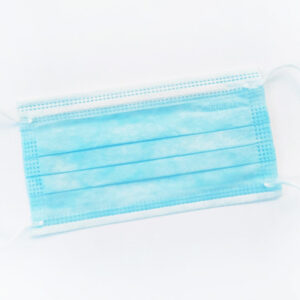
- Chlorhexidine Alcohol Wipes, Hand Wipes, Facemask
Required: 1.5-2ml gourmet mushroom spore or liquid culture syringe (not included)
XXL MonoBox Grow Kit Includes:
- 3.1L HEPA-Filtered Grow Box
- 200g of 2000ml Expandable MycoWave™ Mushroom Substrate
- XXL Grow Tent
- 2 Sterile Grain SpawnTubs™ (approx. 1300mL of grain)
- Chlorhexidine Alcohol Wipes, Hand Wipes, Facemask
Required: 3-4ml gourmet mushroom spore or liquid culture syringe (not included)
1. Inoculation of Sterile Grain Spawn
Reducing the risk of contamination is crucial in successful mushroom cultivation, and you can achieve this by working in a small, clean, and draught-free space, ideally using a Still-Air Box (SAB).
Before starting, cleanliness is paramount; take a shower, put on fresh clothes and clean your hands and forearms with a blue Clinell wipe. Ensure you have a face mask on, but hold off on your sterile gloves until step 3.
XL vs XXL Note:
The XL kit comes with 1 SpawnTub while the XXL includes 2 SpawnTubs for added security. With the XXL, if one SpawnTub contaminates, you can still proceed with the other.
You'll notice grey rubber injection ports on the lids of the SpawnTubs. Use a green Clinell alcohol wipe to sanitise these. Now you're ready to inject the spore or culture solution. Pierce the needle through the cleaned rubber port and inject solution into each port: 1.5-2ml for XL kit SpawnTub or 1.5-2ml into each of the two SpawnTubs for XXL kit. Just remember, the pink filters on the tubs are not for injection!
While injecting, direct the needle towards the edge of the SpawnTub. Deposit the entire solution in that area. Now give the SpawnTubs a nice shake to distribute the solution all around (this will dramatically increase colonisation time).
Inoculation Troubleshooting Tips:
- Keep syringe handling to a minimum and only when necessary.
- Rattle the syringe off a surface to unstick and distribute spores.
- Don't touch the rim of the SpawnTub lid or the pink HEPA filter - ever.
- Don't inject too much solution - maximum 2ml per SpawnTub for XL, or 4ml total for XXL.
- Flame sterilise needle between SpawnTubs when reusing syringes.
2. Colonisation of Sterile Grain Spawn
After injecting the spore solution into the SpawnTub(s), it's time to set the stage for the colonisation process. Remember, mycelium is alive and needs to breathe, so storing your SpawnTub(s) in an airtight container is a no-go unless you are regularly replacing the air inside the airtight container. Instead, utilise the cardboard box they arrived in. It acts as a perfect shelter for your colonising SpawnTub(s) and helps keep them free from dirt and dust.
Colonisation Temperatures
Temperature is vital for healthy and fast mycelium growth. Use this table to find the ideal temperature for your inoculation method.
| Method | Ideal Temperature | Expected Time |
|---|---|---|
| Spore Syringe (Beginner) | 18-22°C | 2-4 Weeks |
| Liquid Culture / G2G (Advanced) | 24-26°C | ~1 Week |
Universal Rules:
- Consistency is key. Avoid large temperature swings.
- Heat mats are not recommended. They often create hot spots and condensation, which can lead to contamination.
- Patience is your best tool. These timelines are estimates and can vary.
Colonisation Troubleshooting Tips:
- Nothing happening? Look for condensation (could indicate microbe growth) or trace the mycelium line with a marker and check for growth after a few days.
- Stalled growth? Unstable temperatures are often the culprit. Avoid excessive handling of SpawnTubs.
- Yellow liquid? This is likely metabolites (natural waste products from mycelium) and not contamination.
- Bad smell? This indicates contamination.
- Leave the SpawnTubs alone and forget about them – keep them totally still and clean.
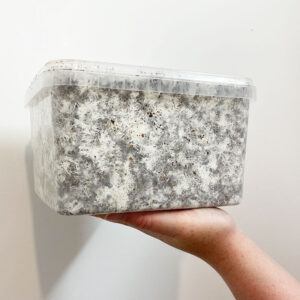
3. Preparing Your Substrate
Once your grain spawn is fully colonised with white mycelium, it's time to prepare the substrate.
Preparing the XL Substrate (Mycowavable™)
Add exactly 450ml of tap water to the coir tub.
Snap the lid shut on three corners, leaving one corner loose to vent steam. Microwave on high for 10 minutes. Cool to room temperature before moving to next stage.
Preparing the XXL Substrate (Mycowavable™)
Add exactly 900ml of tap water to the coir tub.
Snap the lid shut on three corners, leaving one corner loose to vent steam. Microwave on high for 12 minutes. Cool to room temperature before moving to next stage.
Substrate Preparation Tips:
- Always make sure to use a clean microwave if preparing substrate yourself.
- Not all microwaves are the same - if in doubt, give your substrate a couple of minutes longer
- Be patient and allow the substrate to cool before proceeding.
4. Spawning to Substrate
Before proceeding, clean your hands and forearms, and put on your gloves. Take a good handful of coir from within the substrate bag or MonoBox™ and set it aside for later use.
We recommend pouring the coir into a large bowl to make it easier to mix with your spawn. Open your SpawnTub(s) and tip the colonised grain out into the coir. The grain will be in solid blocks that you need to break up - it can take quite a bit of force to get started, but be careful not to squish any grains.
Swiftly and efficiently break up the spawn into individual kernels of grain, as each one is an inoculation point. The better you spread them through the coir substrate, the faster your colonisation will be! Transfer the mix back into your MonoBox™.
Finish with a thin layer of coir on top that you set aside earlier, until you can't see any exposed grain. This is called a casing layer.
Secure the lid on the MonoBox™ and store it somewhere very warm (ideally 24-26°C this time). This is the make or break stage of your grow. In the right conditions, it should take around a week to 10 days to see full colonisation. We highly recommend leaving it for another 3 days after full colonisation to be sure. Do not open your MonoBox™ before then!
Substrate Colonisation Troubleshooting:
- Inspect your spawn: Before mixing, make sure it's 100% colonised with no unpleasant odors.
- Temperature control: Low temperatures slow mycelial growth while microbes may continue growing.
- Be patient: It won't do any harm giving the colonised MonoBox a few days or a week longer to be on the safe side.
- Environmental factors: Avoid opening contaminated foods in your growing area. Be careful with vacuums as they can spread contaminants.
5. The Best Bit... Fruiting Your Mushrooms!
Maintaining a slightly cooler temperature of 20-22°C during this stage is essential. Remove the colonised block, known as a 'cake,' from the MonoBox™ and place it inside your grow tent. Fold over the top of the tent so that humidity can build up inside.

Humidity and Air Exchange
Humidity and FAE (fresh air exchange) are extremely important. Unlike some other grow kits, you should not mist this kit (unless it looks dry). The only time you'll open your tent is when you're ready to harvest. We suggest cutting a 1cm slit through both sides of the tent near the top and placing an electric fan somewhere in the room on a low setting to create a gentle air current.
Light and Pinning
Your mushrooms will need indirect sunlight or a 6-7000K LED light. After around 3-7 days, you'll see tiny white dots (hyphal knots) which will develop into mushroom pins. It will take another 4-5 days for them to mature.
Fruiting Troubleshooting Tips:
- Water pooling: If you see pools of water touching the substrate, dab them with a paper towel.
- Fuzzy stems: This indicates insufficient fresh air exchange (FAE). Try increasing airflow slightly.
- Dry substrate: Only mist if the substrate looks very dry; otherwise, humidity should come from the cake itself.
- Aborted pins: Often caused by environmental changes. Maintain consistent conditions.
Harvesting and Subsequent Flushes
When the veil beneath one of your mushroom caps is about to tear, it's time to harvest. It's best to cut the mushrooms off with a clean scalpel or knife.
After you've harvested, you can "dunk" the cake to rehydrate it. Submerge the cake in a container of water for 6-24 hours, using a weight to keep it down. After dunking, rinse the cake, let it drain, and place it back in the grow tent for the next flush. You should be able to achieve multiple flushes.
Expected Yields
With proper care and optimal conditions:
- XL Kit: Potential yields of 500-600g+ of fresh mushrooms across multiple flushes.
- XXL Kit: Potential yields of 800-1000g+ of fresh mushrooms across multiple flushes.
Happy shroomin' folks!
Last updated on 1 March 2025
| 5 star | 94% | |
| 4 star | 3% | |
| 3 star | 2% | |
| 2 star | 1% | |
| 1 star | 0% |
Great piece of kit, highly recommended
Well thought out product with covering all needs
Unfortunately no growth at all this time.
Hi there, don’t give up – nature doesn’t always want to play ball. Did your grow kit have any smell suggesting contamination?
The guides are very well made and the grow kits are made so that you actually understand each stage of the growing process and learn how mycelium actually works. It can take you from 0 to an experienced and knowledgeable grower.
A great place to start if you’re interested in growing your own medicinal or gourmet mushrooms. Works every time.