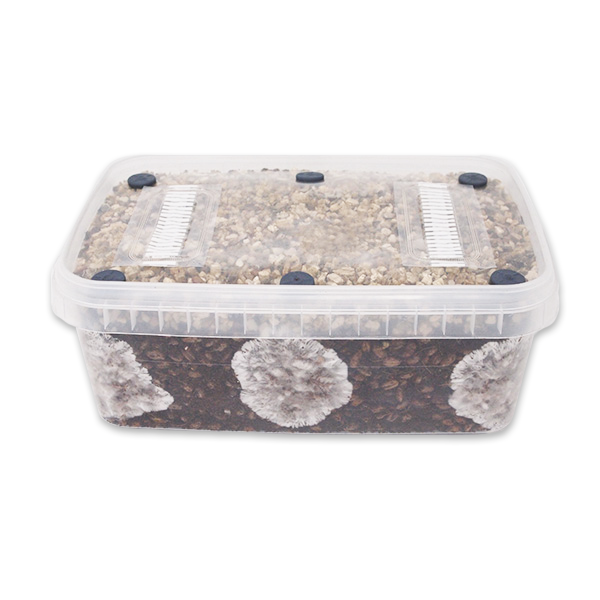


XL Special MycoBox Grow Kit
As of Saturday 29th November, we have run out of stock of all grow kits (it’s been super busy).
BUT, we have the brand new Letterbox Monster Grow Kit available now!
Sterilised at 15 PSI in an electric autoclave.
Processed and bagged within an ISO Class 5 cleanroom.
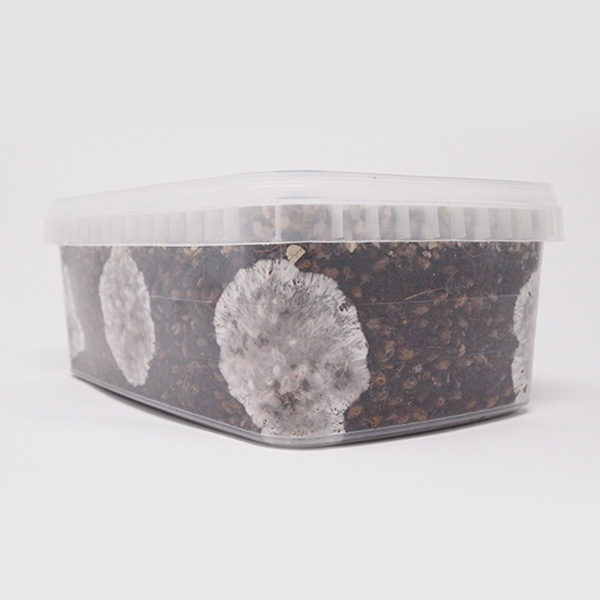
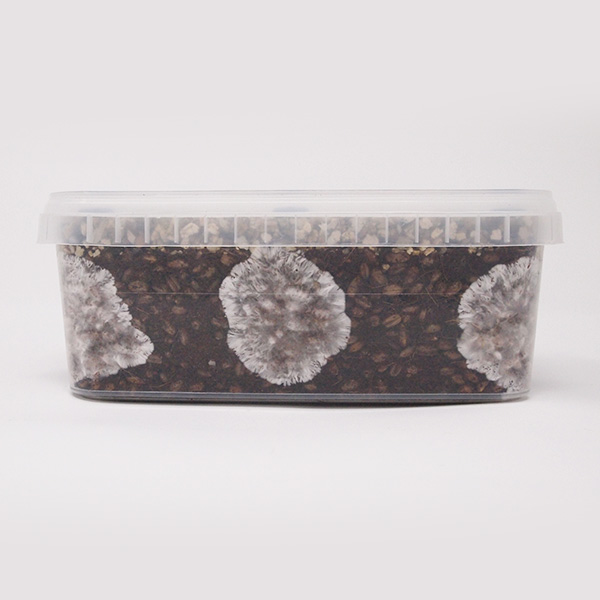
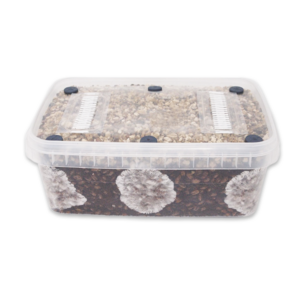
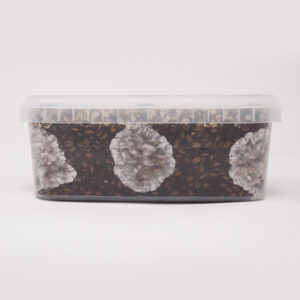
Filled with perfectly hydrated Rye Grain, Coir, Coffee and Gypsum, this grow kit is capable of an impressive flush size.
Your favourite mushroom species will soon consume this substrate and provide up to 3+ packed harvests until the substrate is completely shrunk and spent of nutrients. Just show it some love.. and humidity!
Imitation is the greatest form of flattery (well, kind of…)
If you’re new to the scene, you can be forgiven for thinking this grow kit looks similar to others – but you’d be wrong. This is the real deal, authentic version. Not a potato lookalike!
History with this grow kit
XL Cylocybe Special MycoBox Grow Kit holds a special place in our hearts – it’s a brilliant, simple grow kit which has stood the test of time.
Released in January 2019, our XL Special MycoBox Grow Kit quickly became the UK’s biggest selling grow kit for how easy it was to use.
Why did we stop selling this kit while it was still the UK’s most popular grow kit?
Few different reasons for this:
- The kit is time consuming for us to produce with all the little injection ports and a complex substrate recipe.
- Another shop said they thought of the word mycobox first (a completely different kind of grow kit…).
- We wanted to give our brand new MonoBox Grow Kit a fighting chance (it worked!).
Why’s it back with the same name?
We’re relaunching this kit with the original name because the other shop later went on to copy our MonoBox grow kit! Plus, it seems that every shop now uses the name ‘mycobox’ but copies OUR design so we’re here to take that back. It feels right.
Inoculation
- Carefully clean the rubber injection ports with the included wipes.
- Inject 0.5ml-1ml of a gourmet spore / culture syringe deep into each of the ports.
- Leave the MycoBox alone in a warm place to fully colonise.
- Follow the rest of the guide until harvest – Simple!
Important
The white HEPA filters on the lid will filter dust and mould spores and allow clean air exchange – Don’t ever try to remove these. NEVER open the MycoBox before full colonisation of mycelium or the kit will be ruined with contamination.
What’s included
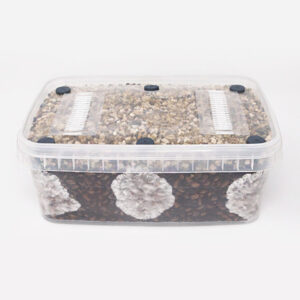
- 1200ml MycoBox of Organic Rye Grain Substrate with added Coir, Gypsum and Coffee.
- HEPA-Filtered and injection port lid system for ultimate contamination resistance.
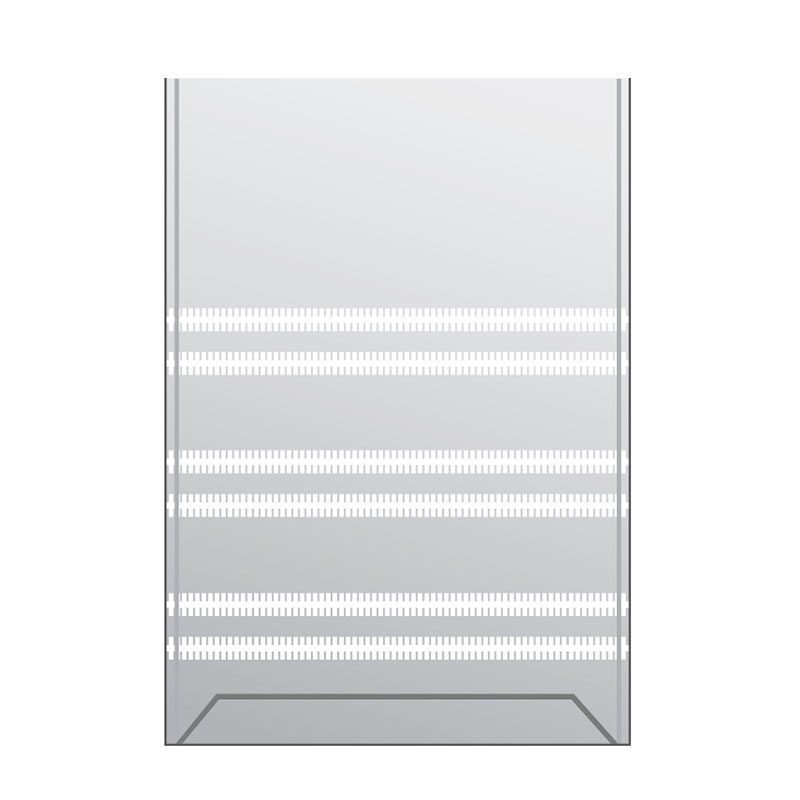
- XL Ultra Humid Breathable Grow Tent (L32xH49cm) to fruit your mushrooms inside.
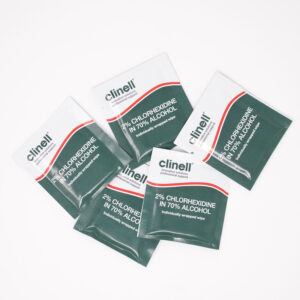
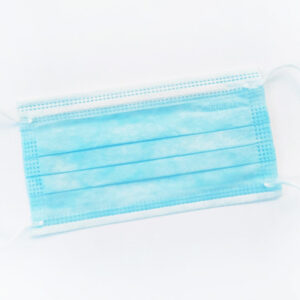
- Hygiene Kit with 3-ply face mask, 2x hand wipes, 2x chlorhexidine wipes and 2x sterile needles.
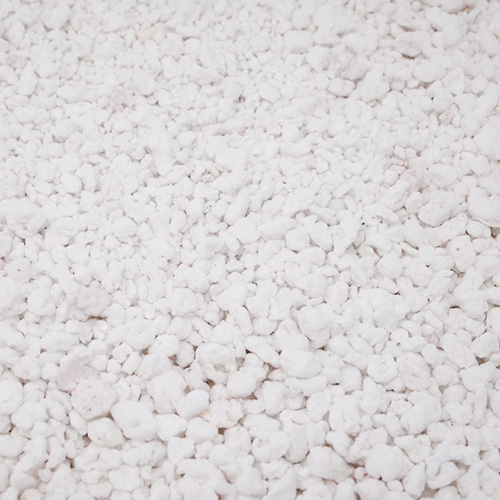
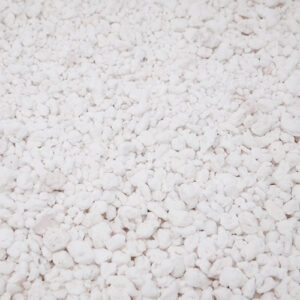
- 1500ml Perlite to maintain the perfect humidity level throughout the mushroom fruiting process.
- Online Instructions.
Not included
Gourmet Spore or Culture Syringe – You will need 3-6ml of solution for the MycoBox.
Storage
We would advise that you inoculate your grow kit within 4 weeks. The longer you leave it, the more moisture will be lost from the substrate and if too much moisture is lost, colonisation will just not happen. Always use your grow kits as soon as you possibly can!
Advice
- This grow kit is tailored for larger flush sizes. If you’re looking for the opportunity to grow three different gourmet varieties at the same time – try our PF-Tek MycoPots Grow Kit.
- The MycoBox dimensions are L18 x W12 x H7 (cm).
- Typically takes around 5-8 weeks to fully colonise in optimal conditions. Exact times are impossible to say as it’s dependant on a lot of factors like genetics, etc.
- A gourmet multispore syringe can have tens of thousands / millions of different genetics, so it can be pot luck which traits you get. Whereas a gourmet culture syringe has predictable and pre-determined genetics.
- Some wood-loving species like Shiitake will fruit on this substrate.
Important
We ship from the UK to almost anywhere in the world. Each kit is made fresh to order and typically dispatched within 3 working days (see our Shipping and Dispatch page for more info). This product is for cultivating legal mushroom species only – please check your local laws before use.
Grow Guide for Special MycoBox™ Grow Kit
Follow this comprehensive guide to achieve the best results with your Special MycoBox™ Grow Kit. We also recommend reading our troubleshooting guide for more detailed information which will help you solve and avoid problems.
Kit Contents
Special MycoBox™ Grow Kit Includes:
- 1200ml MycoBox™ with HEPA-Filtered Lid (Organic Rye Grain, Coir, Gypsum & Coffee)
- XL Ultra-Humid Breathable Grow Tent (L32xH49cm)
- 1500ml Perlite for maximum humidity
- Hygiene Kit with Facemask, Wipes, Needles & Sterile Gloves (if selected)
Required: 3ml gourmet mushroom spore or liquid culture syringe (not included)
1. Inoculation of Sterile Cylocybe Special Substrate
Reducing the risk of contamination is crucial in successful mushroom cultivation, and you can achieve this by working in a small, clean, and draught-free space, ideally using a Still-Air Box (SAB).
Before starting, cleanliness is paramount; take a shower, put on fresh clothes and clean your hands and forearms with a blue Clinell wipe. Ensure you have a face mask on, and put on your sterile gloves.
Next, prepare your syringe by attaching a new sterile needle. Now, take out your MycoBox from the bag. Be mindful, once removed from the bag, it is more exposed to the open air and any potential contaminants - that's why working within an SAB is strongly recommended to minimise this risk.
Clean all of the grey rubber injection ports on the MycoBox lid with a green Clinell wipe. Don't touch or try to remove the white air filter strips - this is essential.
Distribute 3ml of your gourmet spore or culture solution between all the injection ports - take care and do not add any more than 3ml in total to your MycoBox.
If you have any solution left and want to store it - flame sterilise the needle until red hot, leave it a few seconds to cool before putting the cover back on and then keep the syringe with needle attached in a cool, dark place - a drawer is ideal. Before using it again, flame sterilise it another time for good luck.
Inoculation Troubleshooting Tips:
- Keep syringe handling to a minimum and only when necessary.
- Rattle the syringe off a surface to unstick and distribute spores.
- Don't touch the white air filter strips - ever.
- Don't inject too much solution - 3ml syringe maximum.
- Flame sterilise needle before storage and before next use.
2. Colonisation of Cylocybe Special Substrate
After injecting the spore solution into the MycoBox, it's time to set the stage for the colonisation process. Remember, Mycelium is alive and needs to breathe, so storing your MycoBox in an airtight container is a no-go. Instead, utilise the cardboard box it arrived in. It acts as a perfect shelter for your colonising MycoBox and helps keep it free from dirt and dust.
Temperature plays a vital role in the colonisation process. High heat (above 26°C) or cold conditions (below 20°C) can invite problems like contamination or sluggish to non-existent growth. The sweet spot lies between 20-26°C, and consistency is key here. Heat mats are not recommended as they can cause undue condensation, potentially leading to a breeding ground for contaminants in your MycoBox.
Maintaining the right temperature can be challenging. If you find yourself in this situation, an incubator might be the solution. It's a more cost-effective choice compared to running your home's heating system constantly, and it tends to yield better results.
With conditions optimised at 26°C, you can usually expect your MycoBox to be fully colonised in about 4 weeks. Still, nature likes to keep us on our toes, and this timeline can fluctuate based on a multitude of factors. Patience will be your ally here.
Colonisation Troubleshooting Tips:
- Nothing happening? Look for condensation (could indicate microbe growth) or trace the mycelium line with a marker and check for growth after a few days.
- Stalled growth? Unstable temperatures are often the culprit. Avoid excessive handling of the MycoBox.
- Yellow liquid? This is likely metabolites (natural waste products from mycelium) and not contamination.
- Bad smell? This usually indicates contamination. Give the filter a smell to check.
- Leave the MycoBox alone and forget about it - keep it totally still and clean.
3. Dunking for Humidity and Hydration
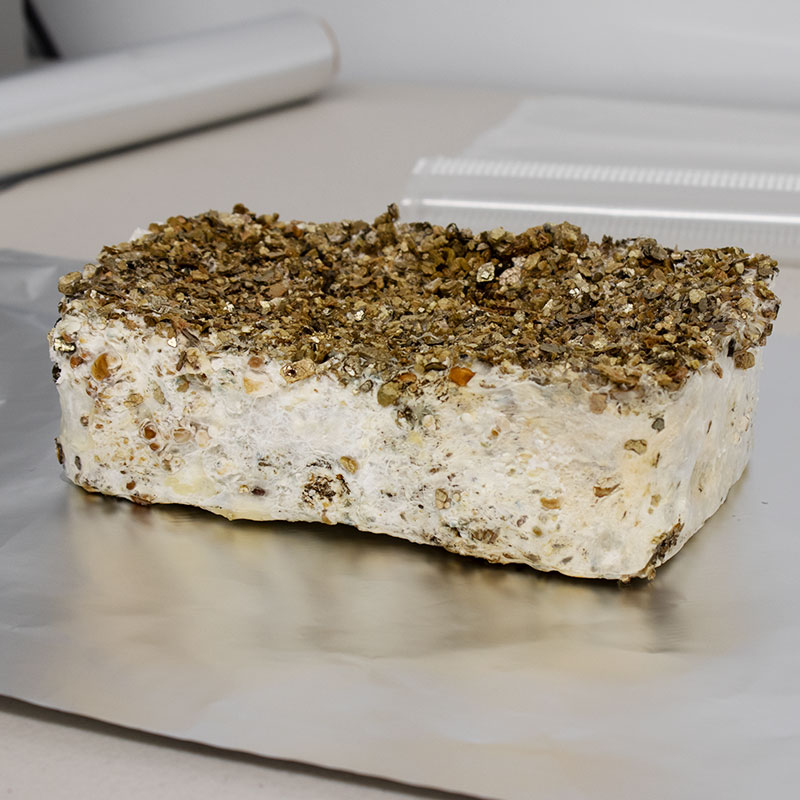
When the substrate is fully colonised (completely covered in white mycelium), you are ready to use a method called 'dunking' to prepare for fruiting. Do not ever take the lid off your MycoBox before full colonisation. Note that if the dry vermiculite layer on top isn't covered in mycelium, this is normal - you're looking for the dark substrate underneath to be completely white.
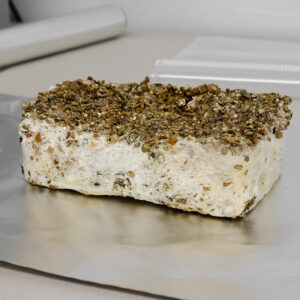
Fill a container with water deep enough to submerge your colonised substrate (known as a 'cake'). Open your MycoBox and remove the colonised cake - it will be a solid block. Place this in the water and use something like a plate to weigh the cake down to stop it floating, as you need it to be fully covered in water at all times.
Put a lid on the container or cover it to keep everything clean. Leave your cake submerged like this for anything between 6-24 hours, depending on how much patience you have. The longer you leave it, the better your results will be.
Dunking Troubleshooting Tips:
- Ensure the cake is 100% colonised before dunking.
- Use clean, room temperature water.
- Make sure the cake remains fully submerged for the entire dunking period.
- Cover the container to prevent contamination while dunking.
- Longer dunking periods (closer to 24 hours) generally produce better results.
4. Perlite for Maximum Humidity
Perlite Step Note:
If you didn't opt for the Enhanced version of the kit, skip this step.
Pour your perlite into a strainer and rinse under a tap until it's soaking wet. When it stops dripping, pour it all into the provided XL Grow Tent. Please cover your mouth and nose when working with perlite - it's dusty and can be harmful if inhaled.
Perlite Preparation Tips:
- Always wear a mask when handling dry perlite.
- Rinse thoroughly until the water runs clear.
- Let excess water drain completely before adding to the grow tent.
- Keep perlite away from direct light sources which can dry it out.
5. Place Cake into XL Grow Tent
If you're using perlite, cut a piece of tin foil slightly larger than your cake and place this on top of the perlite so the cake doesn't touch it.
After your cake is finished dunking, take it out of the water and give it a rinse under a tap. Allow excess water to drain off and then carefully place it into the XL Grow Tent.
Make sure to fold over the top of your grow tent to keep the humidity in and contaminants out. A little tape might come in handy if it's not staying closed.
Tent Setup Tips:
- Ensure the tin foil barrier is slightly larger than your cake.
- Place cake in the center of the tent for optimal air circulation.
- Secure the tent opening properly to maintain humidity.
- Position the tent away from direct sunlight, air vents, or drafty areas.
6. The Best Bit... Fruiting Your Mushrooms!
Maintaining a slightly cooler temperature of 20-22°C during the fruiting stage is essential for best results with many popular species of mushrooms. Essential levels of humidity will naturally build up inside the grow tent from the water you allowed to soak into the substrate during dunking.
Unlike some other grow kits, you should not mist this kit (unless it looks dry). The only time you'll open your tent is when you're ready to harvest your mushrooms. Even peeking for a few seconds is enough to lose humidity and cause growth defects such as aborted pins and caps breaking.
Humidity and Air Exchange
Humidity and FAE (fresh air exchange) are extremely important for pinning and healthy mushroom development, as is temperature and light. They all need to work in harmony.
We suggest cutting a 1cm slit through both sides of the tent near the top and placing an electric fan somewhere in the room on a low setting. This will create a gentle air current inside the room, which will help increase the FAE inside the grow tent.
Light and Environmental Conditions
Your mushrooms will need light to grow. We recommend indirect sunlight or a 6-7000K LED or fluorescent light a few feet away - if the light is heating the substrate, move it further away.
If you notice the inside of your grow tent looking dry, it may be due to the fan being too close, the holes you cut being too big, or grow lights (if using them) being too close and hot. Observe what's happening and adjust your setup as required. Fantastic results depend on it.
Pinning and Growth
After around 3-7 days, you'll hopefully begin to see lots of tiny white dots. These are hyphal knots that will develop into primordia, aka mushroom pins. It will take 4-5 days for them to grow into fully mature mushrooms ready for harvest.
During this time, they'll let you know if something isn't quite right. Fuzzy mycelium at the base of the mushrooms and/or thin stems are an indication that more FAE is needed. Increasing the fan speed or length of the cuts on the bag might be something to try.
Don't worry about any mushrooms growing around the sides and bottom of the cake. You'll still be able to harvest them. If you want to give your mushrooms more room to grow next time, use a fruiting chamber instead of a grow tent.
Fruiting Troubleshooting Tips:
- Water pooling: If you see pools of water touching the substrate, dab them with a paper towel. Standing water can become contaminated quickly.
- Temperature issues: Maintain stable temperature between 20-22°C. Unstable temps can lead to excessive condensation.
- Fuzzy stems: This indicates insufficient fresh air exchange (FAE). Try increasing airflow slightly.
- Dry substrate: Only mist if the substrate looks dry; otherwise, humidity should come from the substrate itself.
- Aborted pins: Often caused by environmental changes. Maintain consistent conditions.
Harvesting and Subsequent Flushes
When the veil beneath one of your mushroom caps is about to tear off, this is when you should harvest your first flush. For best results, repeat the dunking process after each flush and re-hydrate the perlite. If you've taken good care of your grow kit, you should achieve multiple flushes of beautiful mushrooms before the nutrients are all used up.
Expected Yields
With proper care and optimal conditions, the Special MycoBox™ can produce impressive harvests across multiple flushes. Remember that each flush typically produces less than the previous one, with the first flush usually being the most abundant.
Happy shroomin' folks!
Last updated on 11 November 2025
| 5 star | 89% | |
| 4 star | 0% | |
| 3 star | 7% | |
| 2 star | 0% | |
| 1 star | 4% |
Great!
Very easy to work with
Seems to be working perfectly
its too early to say right now, but fingers crossed! I really like the look of the product though. The whole kit was superb.